Starting point for this document is that you have an Admin-account for the Microsoft online services.
- Login to https://portal.azure.com with your Microsoft email and password
- Click Azure Active Directory on the welcome screen:

3. Then click on App-registrations in the menu left:
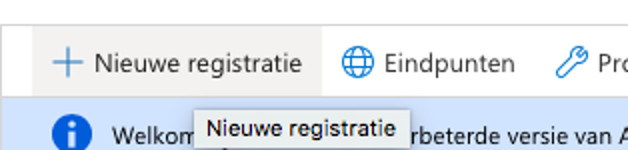
 4. Now choose a New registration:
5. In the form that appears, you can fill in a name like ‘Viadesk App’, and leave the other inputs on default, and choose Register
6. On the next screen, please read and store the Application-id (client-id) and the Map-id (tenant-id) for later use:
 7. In the menu left, click on Verification, and enter for Viadesk the following four redirect-URI’s with the type web:

[root]
[root]/do/sharepointtoken
[root]/do/office365token
[root]/do/openidauthenticate
 8. Back on the main screen, choose the option Show API-permissions:
 9. Choose API-permissions in the menu left:
 10. Then add a permission with the + button:
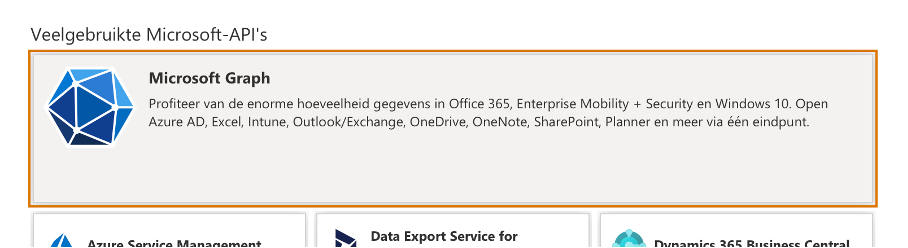
 11. On the next screen, scroll to the Microsoft Graph API:
 12. Choose Delegated permissions, and use the searchbox to look for “files”. The option Files.read will appear. Repeat this for openid, mail and calendars.
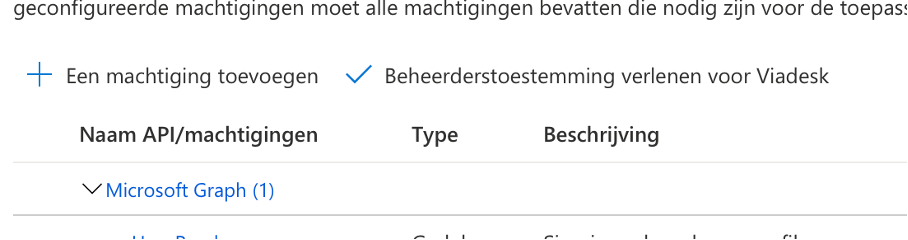
 13. At least the permissions Calendars.Read.Share, Mail.ReadBasic, OnlineMeetings.ReadWrite, Sites.FullControl.All en User.Read.All need to be checked for the Viadesk App:

14. Choose the submit-button to save your permissions.
15. Optional: choose Grant admin consent for [...] so users won't have to accept these permissions the first time they login with SSO:

16. Finally choose Certificates and secrets in the menu:
 17. Generate a New clientsecret, and store the value immediately, as it cannot be read on a later moment:

N.B.: Please set the expiry-date in your agenda, or put it far away in the future. After the expiry date of a Secret, nobody can log in using this App.
18. As a final step, the following data can be sent to Viadesk: Application-id (client-id), Map-id (tenant-id), and Secret.